Project 6: Paving

Just quietly, our outdoor space is looking awesome! Even today, when we only had a high of 15C, it was just so lovely to sit outside in the sun and soak up all our hard work.

So what have we done?

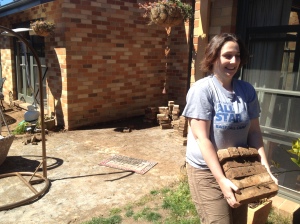
We tore up the mouldy old bricks and sold them on. Garden maintenance is really the kind of work that is so much easier with friends. I’d only managed a few rows over two hours, but with the A-team, we had them up and on the curb by lunchtime.

Clearing out the old to make way with the new. Thanks A-Team!

Clearing out the old to make way with the new. Thanks A-Team!

After umming and aaahing over what look we were  going for, we settled on Timberstone pavers from Amber.

Beautiful Timberstone pavers from Amber, Fyshwick.

Beautiful Timberstone pavers from Amber, Fyshwick.

The area was relatively flat and already had a base of paving sand so we were ready to go. We threw down a weed-mat, got out a string-line and got cracking.

A paving project in pictures:

Getting ready...

Getting ready…

Prepping the site...

Prepping the site…

Almost ready...

Almost ready…

Progress! First one down!

Progress! First one down!

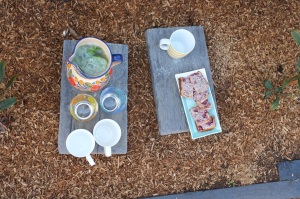
Tea break!

Tea break!

Checking it's straight.

Checking it’s straight.

Team level-checking.

Team level-checking.

Everyone pitches in! Sweeping sand (and tip top tip: some bicarb to keep ants away) into the cracks.

Everyone pitches in! Sweeping sand (and tip top tip: some bicarb to keep ants away) into the cracks.

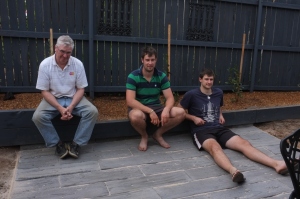
Done! The team looks exhausted!

Done! The team looks exhausted!


We’re adding lawn, furniture and a fence shortly, so more pictures to come.

Total Cost: pavers $2559, ute borrowed from the best bro-law eva, labour paid for with food, tools seemed to turn up with the labourers, weed-mat about $20, wooden edging and pegs $25, extra sand borrowed from the bocce court. Also, a handy friends husband kindly cut some pavers in half with his circular saw for the cost of a 6-pack.

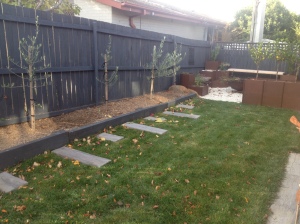
Next step: the stepping stones of course. Cast your vote. Which do you think are best?

Option 1

Option 1

Option 2

Option 2


Side Project: Worm Tubes

In moving to our beautiful, little home, we went from having a large backyard, with TWO dedicated veggie patches, composting corner, lawn, flower beds and paved entertaining area, to an outdoor space of less than a quarter of that. In order to get extra out of our gardens, we had to think critically. Most of the plants in our garden do double-duty. The screening trees along our property line are olive trees (fingers crossed one day they produce enough olives for us to do something fun with). We considered planting stone-fruittrees, however thanks to a humongous neighbourhood tree, afternoon sun is not an issue, and I didn’t like the bareness that would be our view in winter. Also, olive trees are perfectly suited to our Canberra clay soil, so much so, that some folk consider them a weed. The mod-pots in our ‘chill out zone’ provide fragrant herbs. The backdrop to our bocce court is an espaliered valencia orange tree which loves it’s hot brick wall. And an assortment of pots containing limes, a chinotto, blueberry plants, etc., fill in the rest of our plantings.

But all this wasn’t enough for us. We’d gone from having about 9 square metres of veggie patch to basically a few pots. As well, I was starting to be quietly surprised by how much waste we produced. We’re not fans of throwing out leftovers, but even so, just the scraps from food prep was imense. And there’s only 2 of us!

We’ve converted our front garden into a veggie plot. (I have grand plans for gradually morphing it into an Australian version of a classic english cottage garden. I can be very superficial and wonder why can’t a veggie plot look beautiful while being useful?). Over time, the patch will be hemmed in by lavender and lemongrass, with a side border of rosemary. I’d love to plant out a few natives too; I’m thinking fingerlimes (which I hear should do ok in Canberra – has anyone else tried them?) and pepper-berries flanking the front door.

This is all well and good, but doesn’t solve our waste dilema. In all seriousness, I assume that food waste breaks down at the tip, just as it does in our garden, however wouldn’t it be nice to cut out the middle-man and improve our soil too?

I’d heard about these “worm tube” things on the wonderful Pinterest (what did I do before pinterest??) and thought I’d give them a go. Worm-tubes are like a mini compost heap. Definitely for people living small-scale.

So here’s how I did it.

Step 1: Get your gear.

To my surprise, we already had a saw (I was about to head to my bro-laws place to borrow his, but woop woop, we have handy manly stuff, like drills and saws). I bought a piece of PVC plumbing pipe and 2 caps. The pipe is about 20cm in diameter.  As mentioned previosly, I can be a little impatient, so instead of waiting for my very manly, capable, strong husband to come home, I decided to saw the pipe in half by myself while bub slept in the car next to me. I felt so productive to have bought PVC AND saw it in half in one afternoon – small victories.

Step 1: stuff n tools

Step 1: stuff n tools

Turns out I’m not as strong as a 6ft lumberjack. After 20 minutes of sawing I’d gotten 3/4s through and figured snapping the pipe would do the trick. If you’re not as superficial as me, it would. The snapping was devastatingly jagged. I put on my big girl pants and overcame the aesthetics. After all, most of the pipe is going to be in the ground.  Also, bub awoke and demanded to be carried to a more comfortable location. Operation Worm Tube delayed til nap time.

Two jagged halves

Two jagged halves

Step 2: Drillin n power tools n stuff

Step 2: holey moley

Step 2: holey moley

Our drill is a family heirloom, discovered by my grandfather, abandoned in a bag next to his car, and passed down to my dad and now to me. It’s one of those old-school ones that needs to be connected to the wall to work. For some reason the largest drill-bits don’t fit into the drill. Anywho, I installed the largest bit that would fit (size 7), and plugged the drill into the wall. Drilled a heap of holes and voila! worm tube done.

Step 3: Be Dale and dig a hole. 

It’s really pretty simple. Buy pipe. Drill some holes. Dig a hole and bury the pipe in the ground. Then wait for the wormz to come. From here on, I save the kitchen scraps and stuff em in the tube and top it up with some rich soil.
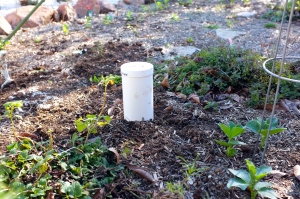
Step 3: Dig a hole and bury it

Step 3: Dig a hole and bury it

Lessons Learned

  1. Use a bigger pipe. I chose a relatively small pipe as to be inconspicuous in the garden. Only problem is it fills up very quickly. Even with two of them. I’m constantly having to dig holes in the garden. Good reason to get a dog? Next time I’ll use a bigger pipe and…
  2. Dig bigger holes. A fair portion of the tube is sticking above ground in the final picture. Now I dig deeper holes so that when I move the tube, all the scraps stay below the surface, away from rats and mice and other nasty scurrying nasties.
  3. Drill bigger holes. Once I figure out how to fit the big drill-bits into the drill I will make the holes bigger so that I can get nice fat worms into the tube. I’d also probably buy a few worms if I knew where to get them from.
Welcome back

Ahoy hoy. It’s been awhile. To be honest, I’ve been a wee bit unmotivated since the arrival of little AB. So here’s a nice simple post to ease back into the blogosphere. 
So what do you do when you have a glut of mandarins and Mr HouseHomeCastle doesn’t like mandarins? We make the easiest cordial ever. 
Step 1

Juice all excess citrus fruit into a measuring glass. Strain through sieve into saucepan. 

Step 2

Add about half as much sugar to saucepan. 

Step 3

Rinse measuring cup with some boiling water. Add to saucepan. 

Step 4

Boil till a slightly syrupy. Pour into strearilsed bottles. THE END. YOURE DONE. SIMPLE. 
We added the cordial to soda water. Really rather nice. Refreshing. A bit sweet but not overly. And easy to tailor. I used mandarins. The next go will be with grapefruit (YUM!!). 


Mr HouseHomeCastle doesn’t like all the seeds. Geez, mandys, what’s with all the seediness??


 Urghmergod! So many mandys! And not looking too crash hot anymore. 
 
Mmmmm. Skull mandarin cordial. Or would you prefer amlfi cordial?


HOT TIP

If you have a bunch of citrus halves leftover after this you can fill some with salt and use as an air fresher. The salt and peel absorb snellyness. I also add cloves. 

Too many Plums!

What do you do with a glut of plums?

So many plums!

So many plums!

We returned home from Yackandandah with a huge haul of plums. We also had a few extra thrown in from the lovely Linda over at From Little Things.

So delicious! But we couldn’t eat them fast enough. To save ourselves from throwing any away, I jumped onto the trusty Taste.com.au and found plenty of recipes to trial.

Enter two new never-before-attempted projects. Upside down cake and plum jam.

The cake didn’t look particularly beautiful, but I promise it was totes delicious (it just needs an instagram filter to make it look good).

Upside-down Cake. Looks a bit regular, tastes delicious!

Upside-down Cake. Looks a bit regular, tastes delicious!

And rather easy to make too. Not sure what I did wrong – the top (which becomes the bottom) caved in. I can never remember – should I leave it in the oven to cool, or take it out right away? Anywho, it was all eaten that very night.

To make the jam I first had to make a red wine syrup which filled the house with spicy christmas smells – cinnamon, peppercorn, star anise, cloves and wine.

Christmasy, spicy, saucey goodness!

Christmasy, spicy, saucy goodness!

I’ve never made jam before, but this recipe was also very simple to follow. This is one of the first recipes that I’ve only had to cook for as long as the recipe called for. After 45 minutes on the stove I tested the jam was set by pouring a small spoonful onto a cold dish and placing it in the freezer for 1 minute. Then, running a finger through the jam it wrinkled and I knew it was done. Voila.

Jarred jam

Jarred jam

I like being able to turn produce into something longer-term, like jams and sauces (next plum project: chinese plum sauce). I only knocked up half a batch with 1kg of plums which created 5 jars (2 jars already gone to good homes). It feels good to be able to share what we make with those around us. Or to say ‘thankyou’ to those that share with us. It didn’t take too long to make, and did not require too many skillz.

Meanwhile, does anyone have any hot tips about de-stoning stone fruits? Halving the plums for the cake, and de-stoning them for the jam took me ages and created a huge mess. There’s got to be an easier way, no?


DIY Gifting – 2015 Calendar

It’s so close to Christmas you can just about hear the silver bells ringing out, ring-a-ling, hear them ring….

But, back to today’s post. This year LS and I set ourselves a budget for the gifts we buy each other for the whole year! Luckily, we only decided on this rule in October in time for our wedding anniversary (buying a house, expecting a little one, setting budgets, we’re basically mature adults!). For our first wedding anniversary, traditionally paper, I bought LS some dress serviettes from Third Draw Down… I thought it was pretty funny. I’m not sure that he agreed.

In any case, my budget was looking pretty good for Christmas gifts. However we are prezzie people. The stocking looked so empty. I decided I needed to get my DIY on and make a few extra stocking stuffers. Enter the 2015 calendar. I filled it with special pictures from the year before – happy snaps from our holidays, wedding, family gatherings, views we’d enjoyed. It’s a wonderful thing to look back and see how so many of our favourite memories were the ones that didn’t cost the world. As Coco Chanel said,

The best things in life are free. The second best are very expensive.

I’ve included the template I made so that you can also make your own gramming calendar. It’s pretty simple to use. Let me know what you think.

Download: 2015 Instagram Calendar

  1. Download the template attached above.
  2. Copy and paste your own instagram pics (or any pics that you like, really) into the blank squares.
  3. I used pictures from the months in which special events occurred, such as photo from our wedding in October and a photo from when we spent Christmas in Paris for December.
  4. To personlise your calendar highlight special dates that are important to you. I’ve highlighted our birthdays, wedding anniversary (just in case I forget) and Christmas.
  5. Print on cardboard. I used whatever I had at hand, which was a slightly yellow colour. You could also take it to a print company if you don’t have a printer and they can print it onto some sturdy invitation paper.
  6. Cut out the months.
  7. Optional: also cut out a rectangle that is slightly longer than two months high. This can be used as a stand.
  8. I used the binding machine at work to bind the top edge of the calendar. Copy shops will also bind for you for a very minimal fee.
  9. And voila, a personalised 2015 calendar with pictures special to you.
Side view to check out the stand made from a long piece of cardboard folded over.

Side view to check out the stand made from a long piece of cardboard folded over.

A peak at my December pic. Bauble portraits in Paris.

A peak at my December pic. Bauble portraits in Paris.

You could also secure the calendar with bulldog clips to act as a stand. See my Papercut 2014 calendar below.

Calendar courtesy of Papercut

Use one bulldog clip as a calendar stand.

Courtesy of Papercut

Use two small bulldog clips to hang your calendar high.

Silver Bells

City sidewalks busy sidewalks
Dressed in holiday style
In the air
There’s a feeling
of Christmas
Children laughing
People passing
Meeting smile after smile
And on every street corner you’ll hear

Silver bells silver bells
It’s Christmas time in the city
ring- a- ling hear them ring
soon it will be Christmas day

Strings of street lights
Even stop lights
Blink a bright red and green
As the shoppers rush
home with their treasures

Hear the snow crunch
See the kids bunch
This is Santa’s big scene
And above all this bustle
You’ll hear
Silver bells, silver bells
It’s Christmas time in the city
Ring-a-ling, hear them ring
Soon it will be Christmas day


Project Cost: Zero – I had the cardboard and binding materials already. All this project cost me was a bit of time.

Next Steps: Sit back and enjoy my beautiful photos. Oh, and wrap the calendar so I can give it away… next steps – make another calendar just for me!

Other Next Steps: I’ve also made some other gifts that I’ll share later, but for now, shhhh, it’s a surprise!