Side Project: Worm Tubes

In moving to our beautiful, little home, we went from having a large backyard, with TWO dedicated veggie patches, composting corner, lawn, flower beds and paved entertaining area, to an outdoor space of less than a quarter of that. In order to get extra out of our gardens, we had to think critically. Most of the plants in our garden do double-duty. The screening trees along our property line are olive trees (fingers crossed one day they produce enough olives for us to do something fun with). We considered planting stone-fruittrees, however thanks to a humongous neighbourhood tree, afternoon sun is not an issue, and I didn’t like the bareness that would be our view in winter. Also, olive trees are perfectly suited to our Canberra clay soil, so much so, that some folk consider them a weed. The mod-pots in our ‘chill out zone’ provide fragrant herbs. The backdrop to our bocce court is an espaliered valencia orange tree which loves it’s hot brick wall. And an assortment of pots containing limes, a chinotto, blueberry plants, etc., fill in the rest of our plantings.

But all this wasn’t enough for us. We’d gone from having about 9 square metres of veggie patch to basically a few pots. As well, I was starting to be quietly surprised by how much waste we produced. We’re not fans of throwing out leftovers, but even so, just the scraps from food prep was imense. And there’s only 2 of us!

We’ve converted our front garden into a veggie plot. (I have grand plans for gradually morphing it into an Australian version of a classic english cottage garden. I can be very superficial and wonder why can’t a veggie plot look beautiful while being useful?). Over time, the patch will be hemmed in by lavender and lemongrass, with a side border of rosemary. I’d love to plant out a few natives too; I’m thinking fingerlimes (which I hear should do ok in Canberra – has anyone else tried them?) and pepper-berries flanking the front door.

This is all well and good, but doesn’t solve our waste dilema. In all seriousness, I assume that food waste breaks down at the tip, just as it does in our garden, however wouldn’t it be nice to cut out the middle-man and improve our soil too?

I’d heard about these “worm tube” things on the wonderful Pinterest (what did I do before pinterest??) and thought I’d give them a go. Worm-tubes are like a mini compost heap. Definitely for people living small-scale.

So here’s how I did it.

Step 1: Get your gear.

To my surprise, we already had a saw (I was about to head to my bro-laws place to borrow his, but woop woop, we have handy manly stuff, like drills and saws). I bought a piece of PVC plumbing pipe and 2 caps. The pipe is about 20cm in diameter.  As mentioned previosly, I can be a little impatient, so instead of waiting for my very manly, capable, strong husband to come home, I decided to saw the pipe in half by myself while bub slept in the car next to me. I felt so productive to have bought PVC AND saw it in half in one afternoon – small victories.

Step 1: stuff n tools

Step 1: stuff n tools

Turns out I’m not as strong as a 6ft lumberjack. After 20 minutes of sawing I’d gotten 3/4s through and figured snapping the pipe would do the trick. If you’re not as superficial as me, it would. The snapping was devastatingly jagged. I put on my big girl pants and overcame the aesthetics. After all, most of the pipe is going to be in the ground.  Also, bub awoke and demanded to be carried to a more comfortable location. Operation Worm Tube delayed til nap time.

Two jagged halves

Two jagged halves

Step 2: Drillin n power tools n stuff

Step 2: holey moley

Step 2: holey moley

Our drill is a family heirloom, discovered by my grandfather, abandoned in a bag next to his car, and passed down to my dad and now to me. It’s one of those old-school ones that needs to be connected to the wall to work. For some reason the largest drill-bits don’t fit into the drill. Anywho, I installed the largest bit that would fit (size 7), and plugged the drill into the wall. Drilled a heap of holes and voila! worm tube done.

Step 3: Be Dale and dig a hole. 

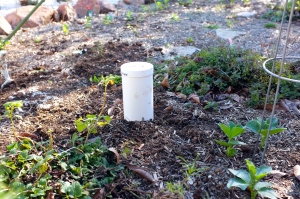
It’s really pretty simple. Buy pipe. Drill some holes. Dig a hole and bury the pipe in the ground. Then wait for the wormz to come. From here on, I save the kitchen scraps and stuff em in the tube and top it up with some rich soil.

Step 3: Dig a hole and bury it

Step 3: Dig a hole and bury it

Lessons Learned

  1. Use a bigger pipe. I chose a relatively small pipe as to be inconspicuous in the garden. Only problem is it fills up very quickly. Even with two of them. I’m constantly having to dig holes in the garden. Good reason to get a dog? Next time I’ll use a bigger pipe and…
  2. Dig bigger holes. A fair portion of the tube is sticking above ground in the final picture. Now I dig deeper holes so that when I move the tube, all the scraps stay below the surface, away from rats and mice and other nasty scurrying nasties.
  3. Drill bigger holes. Once I figure out how to fit the big drill-bits into the drill I will make the holes bigger so that I can get nice fat worms into the tube. I’d also probably buy a few worms if I knew where to get them from.

Welcome back

Ahoy hoy. It’s been awhile. To be honest, I’ve been a wee bit unmotivated since the arrival of little AB. So here’s a nice simple post to ease back into the blogosphere. 
So what do you do when you have a glut of mandarins and Mr HouseHomeCastle doesn’t like mandarins? We make the easiest cordial ever. 
Step 1

Juice all excess citrus fruit into a measuring glass. Strain through sieve into saucepan. 

Step 2

Add about half as much sugar to saucepan. 

Step 3

Rinse measuring cup with some boiling water. Add to saucepan. 

Step 4

Boil till a slightly syrupy. Pour into strearilsed bottles. THE END. YOURE DONE. SIMPLE. 
We added the cordial to soda water. Really rather nice. Refreshing. A bit sweet but not overly. And easy to tailor. I used mandarins. The next go will be with grapefruit (YUM!!). 


Mr HouseHomeCastle doesn’t like all the seeds. Geez, mandys, what’s with all the seediness??


 Urghmergod! So many mandys! And not looking too crash hot anymore. 
 
Mmmmm. Skull mandarin cordial. Or would you prefer amlfi cordial?


HOT TIP

If you have a bunch of citrus halves leftover after this you can fill some with salt and use as an air fresher. The salt and peel absorb snellyness. I also add cloves. 

Too many Plums!

What do you do with a glut of plums?

So many plums!

So many plums!

We returned home from Yackandandah with a huge haul of plums. We also had a few extra thrown in from the lovely Linda over at From Little Things.

So delicious! But we couldn’t eat them fast enough. To save ourselves from throwing any away, I jumped onto the trusty Taste.com.au and found plenty of recipes to trial.

Enter two new never-before-attempted projects. Upside down cake and plum jam.

The cake didn’t look particularly beautiful, but I promise it was totes delicious (it just needs an instagram filter to make it look good).

Upside-down Cake. Looks a bit regular, tastes delicious!

Upside-down Cake. Looks a bit regular, tastes delicious!

And rather easy to make too. Not sure what I did wrong – the top (which becomes the bottom) caved in. I can never remember – should I leave it in the oven to cool, or take it out right away? Anywho, it was all eaten that very night.

To make the jam I first had to make a red wine syrup which filled the house with spicy christmas smells – cinnamon, peppercorn, star anise, cloves and wine.

Christmasy, spicy, saucey goodness!

Christmasy, spicy, saucy goodness!

I’ve never made jam before, but this recipe was also very simple to follow. This is one of the first recipes that I’ve only had to cook for as long as the recipe called for. After 45 minutes on the stove I tested the jam was set by pouring a small spoonful onto a cold dish and placing it in the freezer for 1 minute. Then, running a finger through the jam it wrinkled and I knew it was done. Voila.

Jarred jam

Jarred jam

I like being able to turn produce into something longer-term, like jams and sauces (next plum project: chinese plum sauce). I only knocked up half a batch with 1kg of plums which created 5 jars (2 jars already gone to good homes). It feels good to be able to share what we make with those around us. Or to say ‘thankyou’ to those that share with us. It didn’t take too long to make, and did not require too many skillz.

Meanwhile, does anyone have any hot tips about de-stoning stone fruits? Halving the plums for the cake, and de-stoning them for the jam took me ages and created a huge mess. There’s got to be an easier way, no?


Happy T Day!

Today is Turkey Thanksgiving Day in America. The giving of thanks dates back to the 1600’s in Plymouth, Massachusetts where Pilgrims and Puritans gave thanks for the harvest. Today Thanksgiving is a public holiday celebrated with family and the president pardoning a turkey.

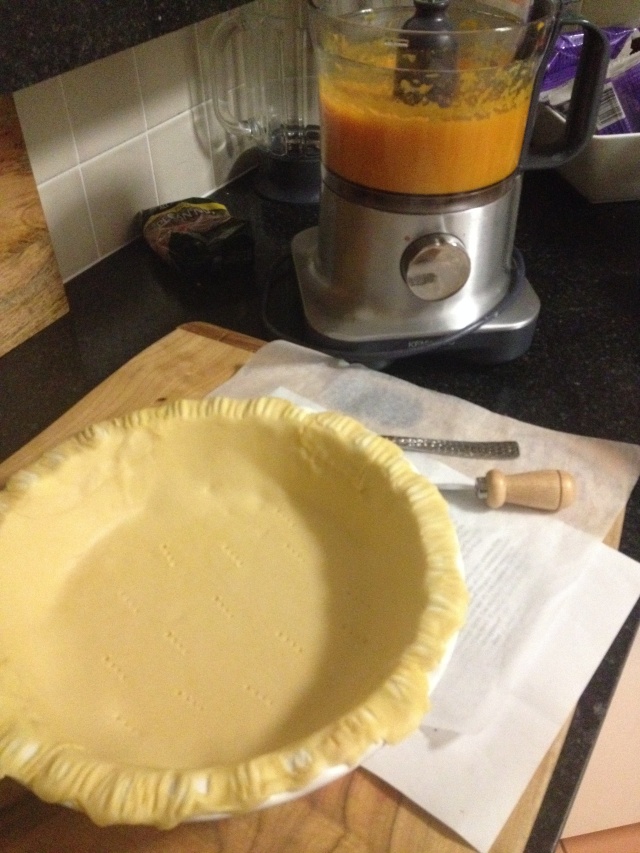
Homemade pumpkin puree and base ready to go.

Homemade pumpkin puree and base ready to go.

While we won’t have a public holiday here today, I’ll celebrate Thanksgiving with the in-laws and Yank Sis-Law on Saturday. I’m baking pumpkin pie with pecan praline sauce!

Let us give thanks for pumpkin, nutmeg, cream and pastry.


So, to properly get in the Thanksgiving spirit how can I give thanks today?

Today I penned a good old fashioned letter to a friend I don’t get to see much. I wanted to let her know I was thinking of her and thankful for our friendship. By writing down my feelings I was able to stop and really consider what our friendship means – the support we provide each other and how special and fabulous she really is.

I also made a conscious effort to give sincere thank-yous to people – to look them in the eye and really mean it when I said thank you – thank you for your time to look over my work, thank you for the care you took in making my coffee, thank you for the smile.

Lastly, out of respect to our American brothers and sisters, I’ll eat maple syrup peanut butter (a recent gift from my sister – thank you) and save lighting up my christmas tree till after Thanksgiving.


In other news, why give thanks? Studies have found that showing gratitude and mindfully giving thanks can improve our own happines. So do it for yourself, and say thank you today. Check out Authentic Happiness for more info. 

Let me take you on a tour

(Note, these pictures are from the open house – while I would love to live in such an un-cluttered house, that is not the reality I live in!).

The house is really lovely. Ready to move in. Nothing really needs doing. But it was built in the 90s and some rooms are looking a little worn out. Other features, like the terracotta tiles, we’re starting to realise might not be the best choice for our region, where it gets crazy cold in winter and tiles on a concrete slab just suck the heat out of the air, even with our ducted (ceiling) heating.

The entryway: Novel and quaint in a newer house. It’s a great place for us to keep our shoes and winter jackets handy. It needs a bit of a tidy up. The front door looks like it’s been painted while closed – there’s a gap of paint at the bottom which is weird. Might need a sign on the door, or a door knocker. A number of people have wandered around our house looking for the front door, somehow not realising that the only door, at the front of the house, is our front door. Project: minimal intervention.

Entryway - the introduction to our home.

Entryway – the introduction to our home.


The living room/dining room: Again, this space is ok. Over time, I’d like to make the flooring consistent (instead of half carpet, half tiles) and we will likely avoid tiles – they are just too chilly in winter. A big plus for this space, which I fell in love with at the first open house, are the huge windows on every wall in the lounge room. To take advantage of all that light without losing any heating/cooling, long term, we will look at installing double-glazed French doors. Project: minimal intervention; long term.

Lounge room - A sunny spot with plenty of natural light.

Lounge room – A sunny spot with plenty of natural light.

Dining room - on the small side.

Dining room – on the small side.


The kitchen: ah ha – here we have our first point of order. It’s not terrible. Like the whole house, it’s fine. It’s even quite nice, with a composite stone bench-top no less. But LS and I like to cook. And it just doesn’t fit two people in there. For instance, you can’t open the pantry and the oven at the same time. And if you’re using the stove cooktop, there’s no space for prep work. The draws and cupboards are getting a bit loose and dinted. And there’s not heaps of task lighting over the benches, making it a little dicey when dicing. On top of this, the hallway next to the kitchen has beautiful double doors that open out to our patio. Only problem is they can’t be opened as the hallway is too narrow. Project: Major – remove a wall (load bearing??), brick-in a doorway, replace flooring, build new kitchen.

Kitchen - Tucked in behind the dining room.

Kitchen – Tucked in behind the dining room.


The bathroom: Again, when people walk in they describe it as “fine”. The number of people who have had the guided tour get to the bathroom and say “oooh, it’s fine”!! It really is fine. There’s a shower-bath, with sliding glass doors. There’s a working sink with plenty of storage underneath. There’s a skylight for some natural light. There are HUGE mirrors. But it is a bit tired. And it would be nice to find hear other descriptive words like “luxurious” or “relaxing”. Project: long term. As it is “fine” we won’t be rushing to fix this up. Moderate project planned – replace fittings, but keep existing layout. Will also paint over the peach and mint trim that is visible on sunny days (!?).

Bathroom - Too small to get a clear picture.

Bathroom – Too small to get a clear picture.


Bedrooms: Here again I hear the same adjective every time – oh, they’re big! And they are. For a small Canberra home, we do have lovely spacious bedrooms. It’s a luxury to have bedside tables on both sides of the bed. And to have enough wardrobe space for the two of us. If I had to nit-pic, I’d say they are a little on the boring side. Maybe that’s just winter talking, but I think we need to inject a bit of colour and brightness into the rooms. Project: minimal – possibly replace floors while doing the dining, lounge, kitchen and hallway. A bit of styling could be done here.

Master bedroom - Spacious master bedroom.

Master bedroom – Spacious master bedroom.

'Guest' Bedroom - also spacious.

‘Guest’ Bedroom – also spacious.


En suite bathroom: Sometimes I think my guests have been handed a script at the front door. At the ensuit they exclaim with delight how “useful” an ensuit is… especially if you do decide to renovate the “fine” main bathroom. The room is compact. We don’t use it much as it doesn’t have much storage. Also why shower when you could bathe? I think the layout could be improved, but this will be something I’ll need to get some advice on. Project: Potentially significant. Shuffle the sink, toilet and shower. Add a vanity with storage. New tiles. New (waterproof) window.

Ensuit bathroom - a cosy little space.

En suite bathroom – a cosy little space.


Garden: oh my lordy, I’m glad we like to garden. Along the permitter there was an abundance of trees. Shame they were scarecrow trees, entwined with creeping ivy and wisteria (both weeds in Canberra). A big weekend with both families chipping in cleared the lot of droopy trees. And my goodness what a difference it made! Let there be light!

It’s great to have the bulk of removal already done. We evaluated every single tree we removed – we didn’t want to rip out trees that could still provide beauty or joy. Any trees or shrubs that could be saved were kept. Some of the native shrubs out the front will be moved to create a hedge and provided much-needed shading for our herb garden. Any trees removed will be replaced with varieties that are well-suited to the soil and local conditions.

The garden gets a fair bit of sun. The challenge will be incorporating producing plants (fruit trees and a veggie patch), providing privacy, letting light in during winter, and finding plants that can tolerate our local conditions (heat and frost). Project: on-going. It feels like a huge head-start to have had the help from our families. It took 7.5 people 2 full days of hard labour to pull out all the bracken and branches. We will upgrade our paved patio, add a bocce court/sandpit, plant some produce, add a gate for our four-legged visitors and get some grass growing! Oh, and weeding weeding weeding.

Patio - a glimpse at the garden.

Patio – a glimpse at the garden.