Project 6: Paving

Just quietly, our outdoor space is looking awesome! Even today, when we only had a high of 15C, it was just so lovely to sit outside in the sun and soak up all our hard work.

So what have we done?

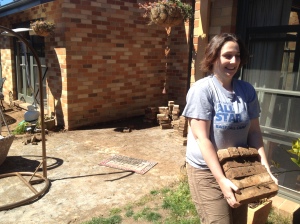
We tore up the mouldy old bricks and sold them on. Garden maintenance is really the kind of work that is so much easier with friends. I’d only managed a few rows over two hours, but with the A-team, we had them up and on the curb by lunchtime.

Clearing out the old to make way with the new. Thanks A-Team!

Clearing out the old to make way with the new. Thanks A-Team!

After umming and aaahing over what look we were  going for, we settled on Timberstone pavers from Amber.

Beautiful Timberstone pavers from Amber, Fyshwick.

Beautiful Timberstone pavers from Amber, Fyshwick.

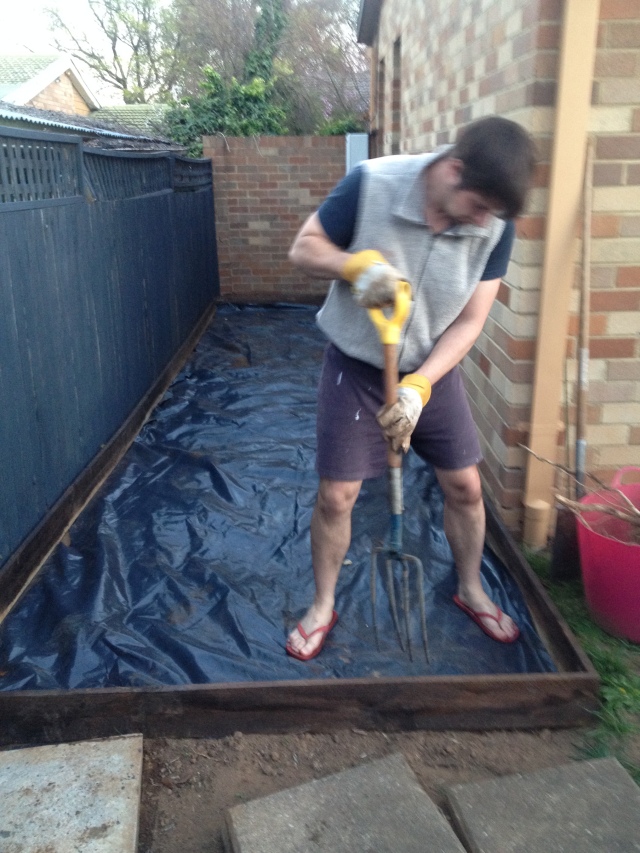
The area was relatively flat and already had a base of paving sand so we were ready to go. We threw down a weed-mat, got out a string-line and got cracking.

A paving project in pictures:

Getting ready...

Getting ready…

Prepping the site...

Prepping the site…

Almost ready...

Almost ready…

Progress! First one down!

Progress! First one down!

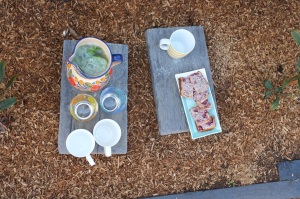
Tea break!

Tea break!

Checking it's straight.

Checking it’s straight.

Team level-checking.

Team level-checking.

Everyone pitches in! Sweeping sand (and tip top tip: some bicarb to keep ants away) into the cracks.

Everyone pitches in! Sweeping sand (and tip top tip: some bicarb to keep ants away) into the cracks.

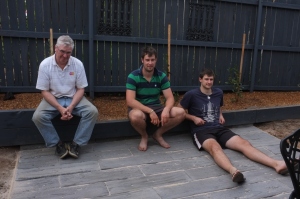
Done! The team looks exhausted!

Done! The team looks exhausted!


We’re adding lawn, furniture and a fence shortly, so more pictures to come.

Total Cost: pavers $2559, ute borrowed from the best bro-law eva, labour paid for with food, tools seemed to turn up with the labourers, weed-mat about $20, wooden edging and pegs $25, extra sand borrowed from the bocce court. Also, a handy friends husband kindly cut some pavers in half with his circular saw for the cost of a 6-pack.

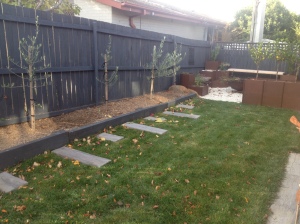
Next step: the stepping stones of course. Cast your vote. Which do you think are best?

Option 1

Option 1

Option 2

Option 2


Side Project: Worm Tubes

In moving to our beautiful, little home, we went from having a large backyard, with TWO dedicated veggie patches, composting corner, lawn, flower beds and paved entertaining area, to an outdoor space of less than a quarter of that. In order to get extra out of our gardens, we had to think critically. Most of the plants in our garden do double-duty. The screening trees along our property line are olive trees (fingers crossed one day they produce enough olives for us to do something fun with). We considered planting stone-fruittrees, however thanks to a humongous neighbourhood tree, afternoon sun is not an issue, and I didn’t like the bareness that would be our view in winter. Also, olive trees are perfectly suited to our Canberra clay soil, so much so, that some folk consider them a weed. The mod-pots in our ‘chill out zone’ provide fragrant herbs. The backdrop to our bocce court is an espaliered valencia orange tree which loves it’s hot brick wall. And an assortment of pots containing limes, a chinotto, blueberry plants, etc., fill in the rest of our plantings.

But all this wasn’t enough for us. We’d gone from having about 9 square metres of veggie patch to basically a few pots. As well, I was starting to be quietly surprised by how much waste we produced. We’re not fans of throwing out leftovers, but even so, just the scraps from food prep was imense. And there’s only 2 of us!

We’ve converted our front garden into a veggie plot. (I have grand plans for gradually morphing it into an Australian version of a classic english cottage garden. I can be very superficial and wonder why can’t a veggie plot look beautiful while being useful?). Over time, the patch will be hemmed in by lavender and lemongrass, with a side border of rosemary. I’d love to plant out a few natives too; I’m thinking fingerlimes (which I hear should do ok in Canberra – has anyone else tried them?) and pepper-berries flanking the front door.

This is all well and good, but doesn’t solve our waste dilema. In all seriousness, I assume that food waste breaks down at the tip, just as it does in our garden, however wouldn’t it be nice to cut out the middle-man and improve our soil too?

I’d heard about these “worm tube” things on the wonderful Pinterest (what did I do before pinterest??) and thought I’d give them a go. Worm-tubes are like a mini compost heap. Definitely for people living small-scale.

So here’s how I did it.

Step 1: Get your gear.

To my surprise, we already had a saw (I was about to head to my bro-laws place to borrow his, but woop woop, we have handy manly stuff, like drills and saws). I bought a piece of PVC plumbing pipe and 2 caps. The pipe is about 20cm in diameter.  As mentioned previosly, I can be a little impatient, so instead of waiting for my very manly, capable, strong husband to come home, I decided to saw the pipe in half by myself while bub slept in the car next to me. I felt so productive to have bought PVC AND saw it in half in one afternoon – small victories.

Step 1: stuff n tools

Step 1: stuff n tools

Turns out I’m not as strong as a 6ft lumberjack. After 20 minutes of sawing I’d gotten 3/4s through and figured snapping the pipe would do the trick. If you’re not as superficial as me, it would. The snapping was devastatingly jagged. I put on my big girl pants and overcame the aesthetics. After all, most of the pipe is going to be in the ground.  Also, bub awoke and demanded to be carried to a more comfortable location. Operation Worm Tube delayed til nap time.

Two jagged halves

Two jagged halves

Step 2: Drillin n power tools n stuff

Step 2: holey moley

Step 2: holey moley

Our drill is a family heirloom, discovered by my grandfather, abandoned in a bag next to his car, and passed down to my dad and now to me. It’s one of those old-school ones that needs to be connected to the wall to work. For some reason the largest drill-bits don’t fit into the drill. Anywho, I installed the largest bit that would fit (size 7), and plugged the drill into the wall. Drilled a heap of holes and voila! worm tube done.

Step 3: Be Dale and dig a hole. 

It’s really pretty simple. Buy pipe. Drill some holes. Dig a hole and bury the pipe in the ground. Then wait for the wormz to come. From here on, I save the kitchen scraps and stuff em in the tube and top it up with some rich soil.
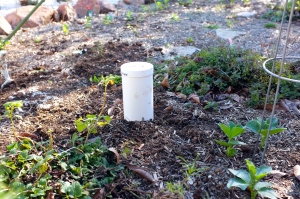
Step 3: Dig a hole and bury it

Step 3: Dig a hole and bury it

Lessons Learned

  1. Use a bigger pipe. I chose a relatively small pipe as to be inconspicuous in the garden. Only problem is it fills up very quickly. Even with two of them. I’m constantly having to dig holes in the garden. Good reason to get a dog? Next time I’ll use a bigger pipe and…
  2. Dig bigger holes. A fair portion of the tube is sticking above ground in the final picture. Now I dig deeper holes so that when I move the tube, all the scraps stay below the surface, away from rats and mice and other nasty scurrying nasties.
  3. Drill bigger holes. Once I figure out how to fit the big drill-bits into the drill I will make the holes bigger so that I can get nice fat worms into the tube. I’d also probably buy a few worms if I knew where to get them from.
Project 3: Bocce!

‘Boules’ is THE French game. Since it was created in 1907 in La Ciotat, in Provence, every single French generation has played it, from the hip youngsters on a sandy square sipping herbal tea to old men by the Seine river sipping red wine and complaining about the weather.

We have a narrow strip of garden that runs behind our house. It’s in shade all morning and intense sun all afternoon. I wanted a lap pool (read: jacuzzi), but wiser minds prevailed. Our families love nothing more than a Sunday Session of bocce, so the husband and bro-law knocked up a frame which we in-filled with sand and road-base for a bocce court. It will be a great use of the space, practical, used a lot and not too expenny to put together.

Some background:

Pétanque, Boules, Lawn Bowls, Bocce… each are slightly different, but generally, the game is played in two teams, each player has two balls (boules) to throw, and the goal is to throw your boules as close as possible to the ‘cochonnet’ (the little ball that you aim at – literally “the piglet”). The winners are the ones who get their boules closest to the cochonnet.

Strategy definitely comes into play – you can knock other people’s boules out of the way to make way for your teammates, or to block someone else. Also, if you play with a creative bunch, you might enjoy “Adventure Bocce” dreamed up by the bro-law, whereby the winner gets to set a rule. This can include standing on one leg, bouncing the boule off rocks, throwing the boules over a tree branch, etc.  you are only limited by your imagination! Please do not try Adventure Bocce if you have nice boules!


prepping the future Zone for Competitive Bocce, Canberra Chapter. A dark and crazy-sunny space. Cleared of ivy, foundation frame in. Not quite the 27.5 metres by 4 metres called for by the Fédération Internationale de Boules, but close enough.


Yay - collecting road base

Yay – collecting road base


Pricking the weed mat so water can permiate through.

Pricking the weed mat with the hinky fork so water can drain away.


Road base in. Fragrant orange tree espaliered along the back wall. Who's up for a game?

Road base in. Frame stained. Fragrant orange tree espaliered along the back wall. Who’s up for a game?

After huffing and puffing about the mismatched woods in our garden, I found some chocolate walnut Feast Watson wood stain (left over from Projects Past) and got stuck in staining the wood. Again, I learned a thing or two (maybe painting is meditative). Firstly, don’t try paint something already installed, with a sprained knee (meaning no crouching or kneeling) and four months pregnant (meaning frequent trips inside to the bathroom). It’s not rocket science, but some things are best learned through experience. So, some things I’ve realised about staining:

  1. Have a cleanish rag handy.
  2. Have a separate pair of shoes at your front door – if you want to duck inside (oh, I don’t know, for a muffin, some water, a hat, to answer the phone, or your fourth trip to the loo), you will wipe down your hands on that rag you cleverly got out at the start of the project, then head inside, only to find extra paint on your wrist/ankle/big toe wind up on the door/floor/wall.
  3. It pays to be choosey about your wood – It maybe just be simple treated pine, but some planks had a beautiful grain which shows up magically once stained. Other planks were rather rough and somewhat detracting from the effect.
  4. If the tin says you need methylated spirits to clean up later, then turpentine won’t do the job. Neither will soap or steel wool. This stuff is a b!t©h to remove! Best to just try not get it on yourself or anything other than the wood.
  5. If you accidentally get any stain on bricks, you can wipe it off (quickly) with a wet rag. Keep one handy for those slip-ups. Rags – the swiss army knife of staining.
  6. Really, just keep a rag with you at all times.
  7. It’s probably easier to stain the wood before you install it – duh – that’s a my hot tip for next time.

Project Cost: $100 for pine frame and the joining bits (braces?). $150 road-base and sand. Case of beer for the loan of the ute. Already had paintbrushes and wood stain. Special thanks goes to bro-law and his go-go-gadget arms, who held the trellis onto the roof of the car – one arm out each window – on the way back from the hardware shop.

Next Project: Play boule!

Project 2: Garden cosmetic facelift

There’s a lot you can learn about yourself, working in the garden. I’m more of an ideas person, it turns out, read: I think of great ideas, then get bored when implementing. My latest greatest idea is to paint our fence. A nice dark colour will help it recede, making our garden look bigger. A dark colour will also contrast nicely with our future pleached olive trees we’ll put in for screening (and yummy olives in 7-10 years).

I’d been looking forward to painting the fence for two weeks! The first week we had a family issue come up. And then it rained for a week. It was looking good for a sunny weekend in week 3. And sunny it was – it was gorgeous! Here in Canberra, after winter, we get excited about 18°C days. I got sunburnt.

Upon opening the paint tin, my first thought was, ‘oh, I guess it dries darker’. It has been said that on occasion, I may overreact. Well, on this occasion, when the paint went on, I may have had a bit of a tanty. The fence was supposed to be dark. Almost-black dark. Instead it looked slightly-overcast grey. I was not impressed. I was drafting strongly worded letters in my mind as I finished off the first coat. I’d had the garden ‘vision’ planned all out – the dark dusty grey/blue fence contrasting behind dappled olive tree leaves. Instead it was the colour of olive tree leaves. Well, for your future reference, here are a few lessons I’ve learned about painting:

  1. Do a test patch…and let it dry! Sounds obvious, but hey, who has the time. The colour looked 100 times better by the afternoon. And perfect by the next evening after the second coat. I could have saved myself a lot of stress if I’d just been patient.
  2. You will never have ‘just the right amount’ of paint. The amount of paint you need will depend on several factors, including the surface. Half of our fence was in great condition – the paint went straight on and we could do it with a roller. The other half was a different story – splintered, crooked, weathered – and required a heap more paint and time to fill in all the cracks. There are online calculators and tools you can use to estimate how much paint you will need, but if the surface is not perfect, you’ll probably need more.
  3. Break the job up. You’ll need to have a bit of time in-between coats anyway, but overall, painting a fence, Karate Kid style, can get really boring. Many folk asked if I found it meditative. My answer is no.
  4. There is very strong correlation between how boring the painting exercise has become, with how much you start slopping on the paint (see chart below).
Paint sloppage v boredom level

Paint sloppage v boredom level


Some happy snaps of the great wall:

First coat. A bit pale and patchy.

First coat. A bit pale and patchy.


Paint everywhere. Pumice is good for removing dried on paint. Blue paint on stockings also dries to look like epic bruising.

Paint everywhere. Pumice is good for removing dried on paint. Blue paint on stockings also dries to look like epic bruising.


Getting a bit of extra help from our friends. LW managed the entire retaining wall by herself. Hungover.

Getting a bit of extra help from our friends. LW managed the entire retaining wall by herself. Hungover.

The great wall. Looking good.

The great wall. Looking good.

Project Cost: $100 for two tins of paint. Had paint roller and paintbrush.

Next Steps: Get some plants in before it get’s baking hot.

Project 1: Garden Prep

As mentioned in the grand tour, there were a lot of scraggly plants to clear: ivy, blue periwinkle and wisteria creeping through the fence, and a heap of plants on such a lean, you’d think they were aiming for the ground.

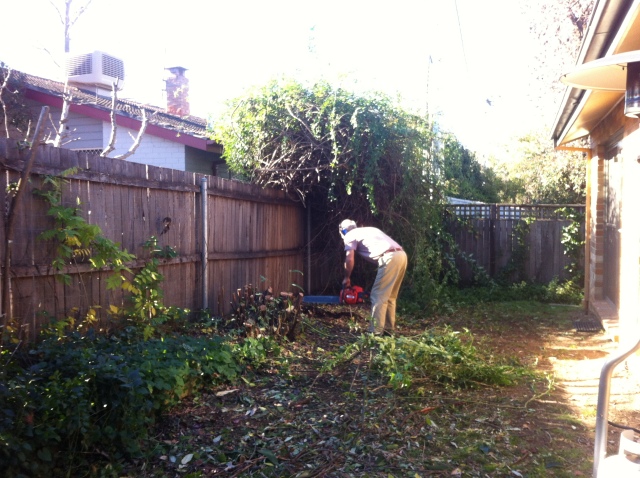
Chainsawing: Bring out the big guns!

Chainsawing: Bring out the big guns!

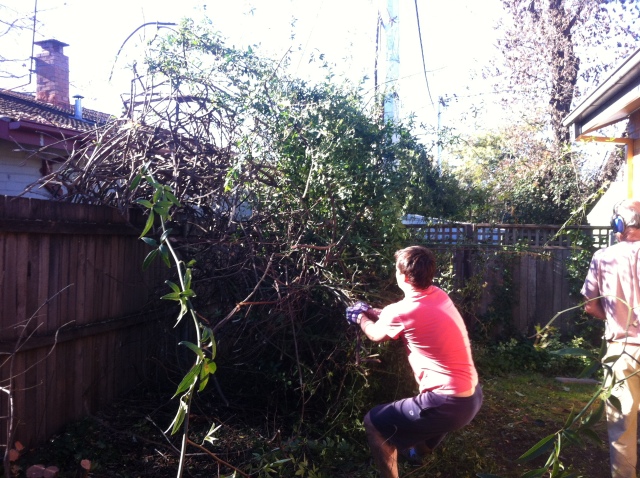
We had plenty of gullible hardworking recruits who pitched in to pull plants out. It felt hard at times to remove every tree. We would have really liked to prune some of the trees into an upright position and save them (giving us a few established plants and saving some $$ in replacing them), but even the few plants we had earmarked to salvage just leaned too far out into the lawn. In the end, everything from the side and back was removed. We were able to keep a few natives from the front garden with some heavy pruning.

A shady corner

A shady corner

A lot of stuff pulled out.

A lot of stuff pulled out.

Is it ivy? wisteria? meh, just get it out!

Is it ivy? wisteria? meh, just get it out!

Heaving out the last stump.

Heaving out the last stump.


The space looks so open now, and light floods in. the garden faces North-North West and gets plenty of Southern Hemisphere sun. It’s going to be a great place to sit out and enjoy with company, or just a quiet coffee.

Let there be light!

Let there be light!

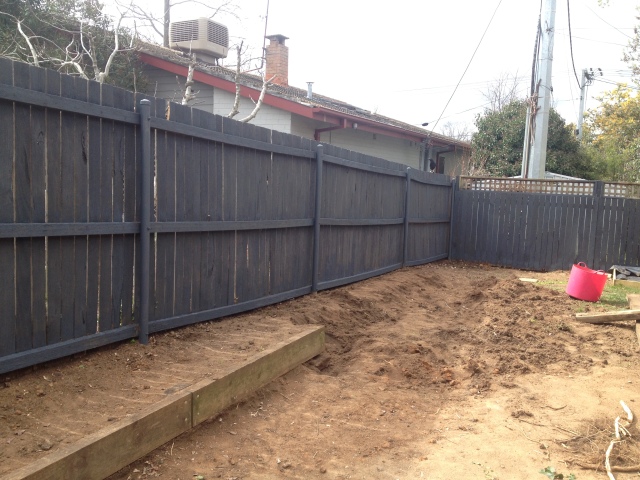
Clean slate.

Clean slate.


Project Cost: Zilch. $0. The tip will take green waste for free, and I don’t count supplying our workers with ploughman lunches in the budget.

Next Steps: After a break to recover, we’ll paint the fence. Perhaps re-pave the courtyard. Will need new lawn after hauling trees through. And the mini bocce court!

Let me take you on a tour

(Note, these pictures are from the open house – while I would love to live in such an un-cluttered house, that is not the reality I live in!).

The house is really lovely. Ready to move in. Nothing really needs doing. But it was built in the 90s and some rooms are looking a little worn out. Other features, like the terracotta tiles, we’re starting to realise might not be the best choice for our region, where it gets crazy cold in winter and tiles on a concrete slab just suck the heat out of the air, even with our ducted (ceiling) heating.

The entryway: Novel and quaint in a newer house. It’s a great place for us to keep our shoes and winter jackets handy. It needs a bit of a tidy up. The front door looks like it’s been painted while closed – there’s a gap of paint at the bottom which is weird. Might need a sign on the door, or a door knocker. A number of people have wandered around our house looking for the front door, somehow not realising that the only door, at the front of the house, is our front door. Project: minimal intervention.

Entryway - the introduction to our home.

Entryway – the introduction to our home.


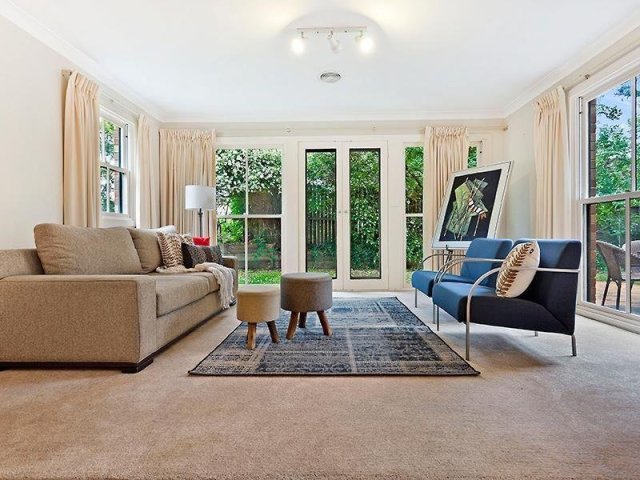
The living room/dining room: Again, this space is ok. Over time, I’d like to make the flooring consistent (instead of half carpet, half tiles) and we will likely avoid tiles – they are just too chilly in winter. A big plus for this space, which I fell in love with at the first open house, are the huge windows on every wall in the lounge room. To take advantage of all that light without losing any heating/cooling, long term, we will look at installing double-glazed French doors. Project: minimal intervention; long term.

Lounge room - A sunny spot with plenty of natural light.

Lounge room – A sunny spot with plenty of natural light.

Dining room - on the small side.

Dining room – on the small side.


The kitchen: ah ha – here we have our first point of order. It’s not terrible. Like the whole house, it’s fine. It’s even quite nice, with a composite stone bench-top no less. But LS and I like to cook. And it just doesn’t fit two people in there. For instance, you can’t open the pantry and the oven at the same time. And if you’re using the stove cooktop, there’s no space for prep work. The draws and cupboards are getting a bit loose and dinted. And there’s not heaps of task lighting over the benches, making it a little dicey when dicing. On top of this, the hallway next to the kitchen has beautiful double doors that open out to our patio. Only problem is they can’t be opened as the hallway is too narrow. Project: Major – remove a wall (load bearing??), brick-in a doorway, replace flooring, build new kitchen.

Kitchen - Tucked in behind the dining room.

Kitchen – Tucked in behind the dining room.


The bathroom: Again, when people walk in they describe it as “fine”. The number of people who have had the guided tour get to the bathroom and say “oooh, it’s fine”!! It really is fine. There’s a shower-bath, with sliding glass doors. There’s a working sink with plenty of storage underneath. There’s a skylight for some natural light. There are HUGE mirrors. But it is a bit tired. And it would be nice to find hear other descriptive words like “luxurious” or “relaxing”. Project: long term. As it is “fine” we won’t be rushing to fix this up. Moderate project planned – replace fittings, but keep existing layout. Will also paint over the peach and mint trim that is visible on sunny days (!?).

Bathroom - Too small to get a clear picture.

Bathroom – Too small to get a clear picture.


Bedrooms: Here again I hear the same adjective every time – oh, they’re big! And they are. For a small Canberra home, we do have lovely spacious bedrooms. It’s a luxury to have bedside tables on both sides of the bed. And to have enough wardrobe space for the two of us. If I had to nit-pic, I’d say they are a little on the boring side. Maybe that’s just winter talking, but I think we need to inject a bit of colour and brightness into the rooms. Project: minimal – possibly replace floors while doing the dining, lounge, kitchen and hallway. A bit of styling could be done here.

Master bedroom - Spacious master bedroom.

Master bedroom – Spacious master bedroom.

'Guest' Bedroom - also spacious.

‘Guest’ Bedroom – also spacious.


En suite bathroom: Sometimes I think my guests have been handed a script at the front door. At the ensuit they exclaim with delight how “useful” an ensuit is… especially if you do decide to renovate the “fine” main bathroom. The room is compact. We don’t use it much as it doesn’t have much storage. Also why shower when you could bathe? I think the layout could be improved, but this will be something I’ll need to get some advice on. Project: Potentially significant. Shuffle the sink, toilet and shower. Add a vanity with storage. New tiles. New (waterproof) window.

Ensuit bathroom - a cosy little space.

En suite bathroom – a cosy little space.


Garden: oh my lordy, I’m glad we like to garden. Along the permitter there was an abundance of trees. Shame they were scarecrow trees, entwined with creeping ivy and wisteria (both weeds in Canberra). A big weekend with both families chipping in cleared the lot of droopy trees. And my goodness what a difference it made! Let there be light!

It’s great to have the bulk of removal already done. We evaluated every single tree we removed – we didn’t want to rip out trees that could still provide beauty or joy. Any trees or shrubs that could be saved were kept. Some of the native shrubs out the front will be moved to create a hedge and provided much-needed shading for our herb garden. Any trees removed will be replaced with varieties that are well-suited to the soil and local conditions.

The garden gets a fair bit of sun. The challenge will be incorporating producing plants (fruit trees and a veggie patch), providing privacy, letting light in during winter, and finding plants that can tolerate our local conditions (heat and frost). Project: on-going. It feels like a huge head-start to have had the help from our families. It took 7.5 people 2 full days of hard labour to pull out all the bracken and branches. We will upgrade our paved patio, add a bocce court/sandpit, plant some produce, add a gate for our four-legged visitors and get some grass growing! Oh, and weeding weeding weeding.

Patio - a glimpse at the garden.

Patio – a glimpse at the garden.